DIY Jewelry Shelf
I hope everyone is having a great week! I have really been into watching The Sorry Girls on Youtube and wanted to try out more of a construction-y DIY project myself. So, I decided to try out DIYing a Jewelry shelf. I think it turned out pretty well for something I made with items around my house. Let me know what you think!
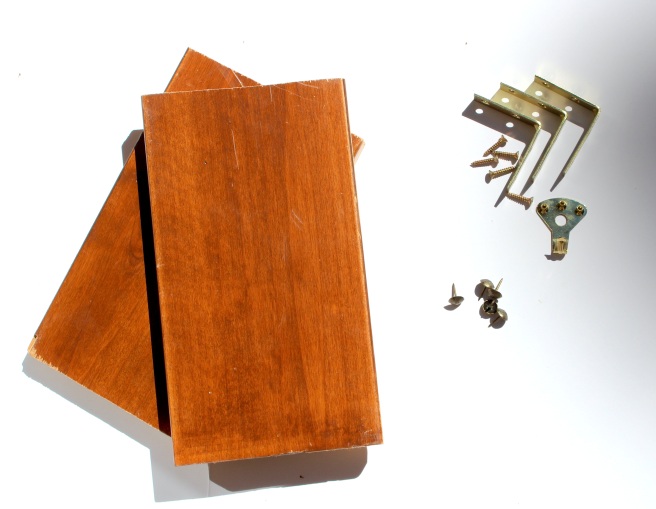
Materials:
- 2 L Brackets and screws
- 2 pieces of wood of the same size
- paint or wallpaper
- nails or hooks
- hammer, screwdriver/drill
- 2 picture hanger hooks
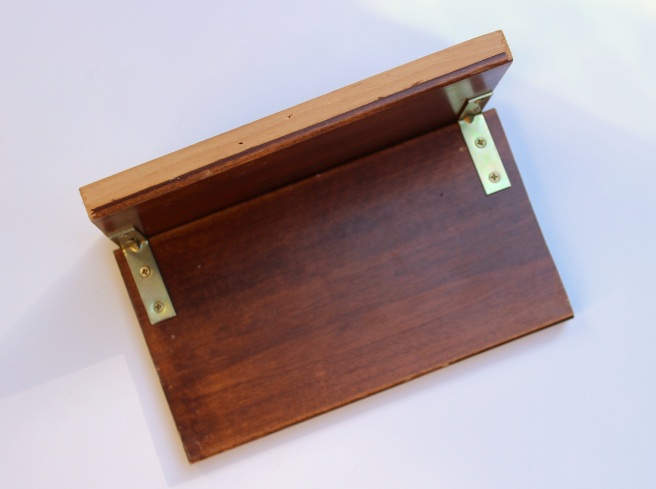
First, attach the two pieces of wood with the L brackets on each end, drilling the screws in. Then, cut out some wallpaper and attached it to the top of the shelf. If I were to do this again, I would just paint the top because it was difficult for me to cut out the wallpaper correctly. Next, I attached 6 cute little nails to the part that will be against the wall, where I will be hanging my jewelry from.
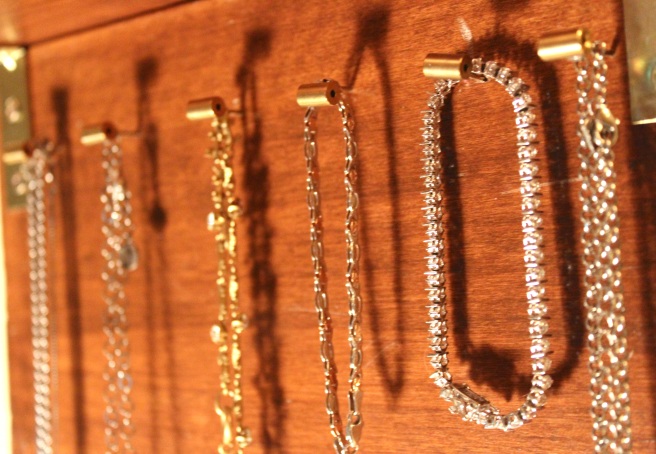
Lastly, on the back, attach two rings for hanging pictures on both ends of the back. Then, holding the shelf against the wall, mark where to attach the hooks to the wall. Once you hang your shelf up, making sure it’s not crooked, you can place your jewelry on the hooks and a few items on top of the shelf. I did use my shelf to put some makeup and perfume on, but I really don’t suggest putting anything too heavy on top. I actually decided to move the Glossier You perfume since I would be heart broken if I accidentally bumped it.
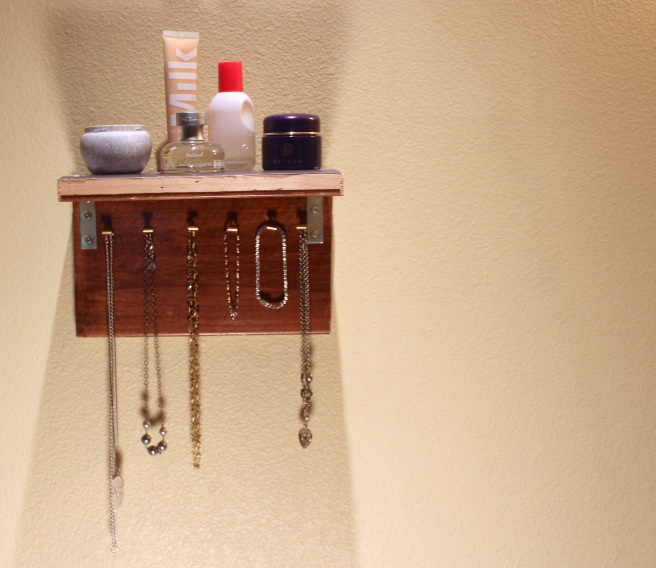
I feel like this turned out okay and was a good start to DIY with wood. I do plan on doing more of these type of DIY projects with furniture next month when I move, but this was good practice. Please let me know if you’ve seen any easy DIY furniture projects that I can try out.
Thanks for reading!
~Hannah


Comments
Post a Comment