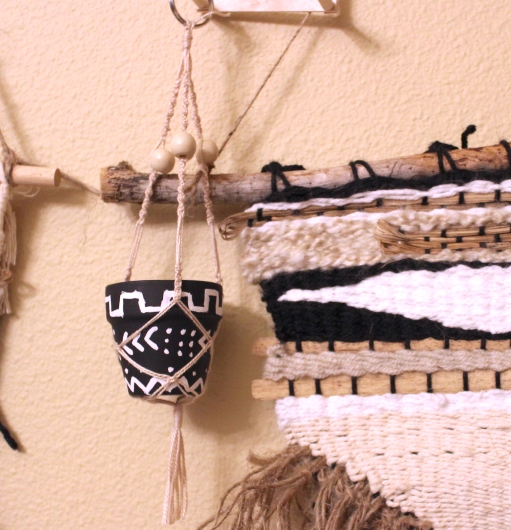
Tiny Terra cotta pot with macrame hanger
Hey everyone, I hope you are all have a great weekend. I was feeling really inspired recently when I went to Walmart and saw these tiny little terra cotta pots. They were only 35 cents each (and you can get them for even cheaper at the thrift store). I have been loving making macrame plant hangers, so I though it would be so adorable to paint these and make tiny little macrame plant hangers. So, I hope this post inspires you to test out our creativity with painting or macrame.

What you need:
- Terra cotta pots (2″)
- Acrylic paint and paintbrushes
- Embroidery thread
- 3 Wood Beads
I got two little pots and there are two patterns that I have been super inspired by lately, mudcloth and terrazzo (see pins below). So, I decided why not try to paint my pots in these patterns.
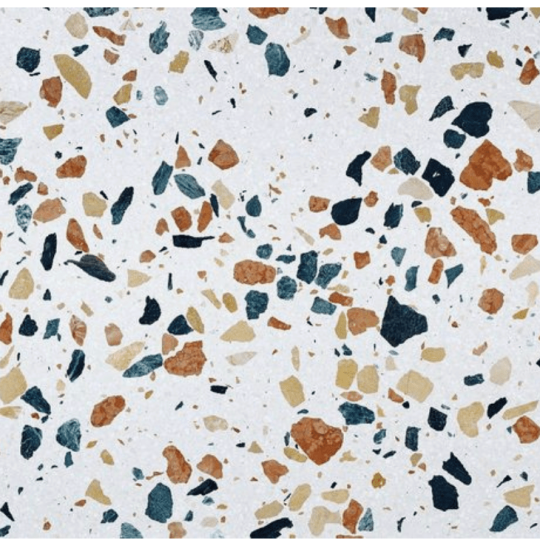

Try out these patterns if you also love them, but there are infinite possibilities for what you could. However, I think these turned out really nice and at first was worried about the terrazzo one, but you really need to keep adding little misshapen dots until you get the right effect.

After the paint has dried you can add in little succulents or air plants, or even fake plants if you don’t have a great green thumb.

Macrame:
- cut out 8 strings that are 37 inches long, string through the split ring so there is an equal length on each side.
- cut out an 12 inch piece of floss and do a gathering knot at the top.
- about 1/2 inch down, spiral stitch x 12, add bead to 2 of the strings, spiral knot x12
- Approximately 1 inch from the last spiral knot, square knot x6
- Take 2 strings from one set and 2 strings from the neighboring set and square knot approximately 1 inch from the last knot. Repeat this step, joining the three different sections together.
- Repeat step 5.
- Approximately an inch down from your last square not, do another gathering knot, which will be the bottom of your plant hanger.
- Cut strings to size.
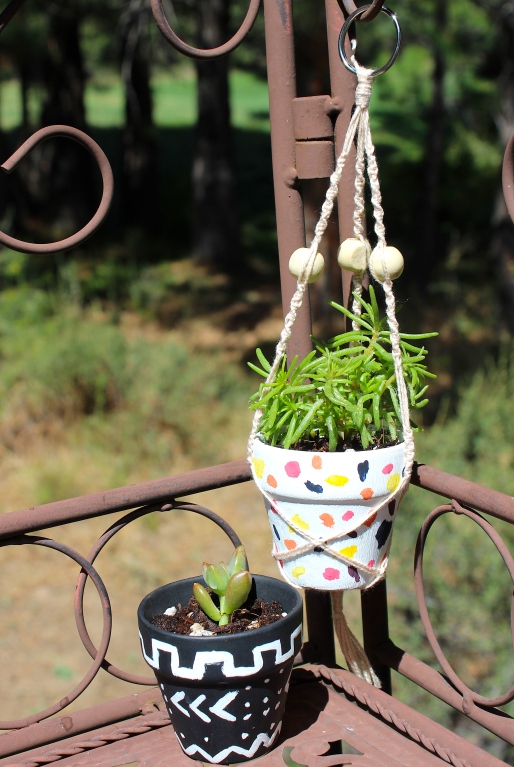
I just love how these little guys turned out and I hope you do too! These little guys are so light you can really hang them anywhere and they add the cutest little touch to a space. If you are interested I can also make a post on making a larger scale macrame plant hanger like the one in my Etsy shop or try my hand at painting different types of ceramics, or even both. I really hope you enjoyed this post and have a wonderful day!
– Hannah


Comments
Post a Comment