Wall Hanging: Natural Fibres and Dried Plants
Hey guys! I was recently very inspired by this post from the blog Kate A Creates for a woven wall hanging. Not only was I inspired by this post to try out DIYing a version of this wall hanging, but to make a little series here on my blog, trying out other blogger’s DIYs. I also have a whole board on Pinterest with DIYs that bloggers have made, so I think it would be fun to do one of these every week or so. So without further ado, let’s get started.
Here is a photo of my inspiration:

Since I don’t have a professional loom, I used the cardboard method I posted about a while ago on my blog, so you can see how I did that here. For this weaving, the first thing I did was just went outside and round up some bark, twigs, and dried out plants as well as any different textures of white yarn I have.
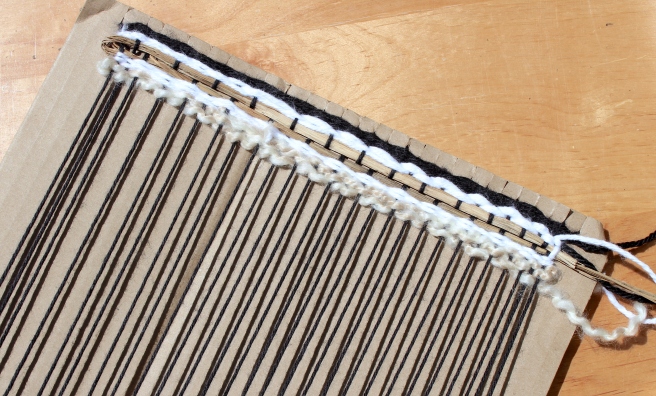
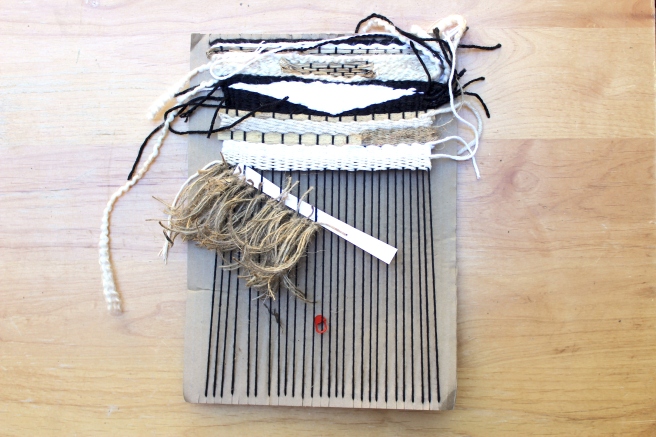
For my wall hanging I also incorporated some black yarn because I didn’t have too many different types of textured white yarn, so I just used the black yarn as well to create some different patterns. I also used some jute to create a tassels in the shape of a V, which I did by wrapping three pieces of the jute around each string and then taking a smaller piece of jute and tying it around to create a tassel. I used a little piece of construction paper as well to measure out where I should place the tassels and just marked where the center is so that I knew when to adjust the paper to start the other half. Then I continued weaving with the white yarn to fill in the empty space. I also just loosely wove in the area below the tassels to ensure they wouldn’t drop down when it was hanging on the wall.
When I was finished with the weaving, I just turned the piece of cardboard around and cut all the strings. I sewed in the bottom part of the strings into the weaving and tied them off behind the hanging. For the top part, I took two strings in front of a stick and two behind and just tied them around the stick, then I trimmed the yarn a bit and hid it behind the weaving. I then attached a piece of jute to hang it up on the wall. Lastly, I took the loose yarn and sewed it into the weaving and trimmed it in the back.
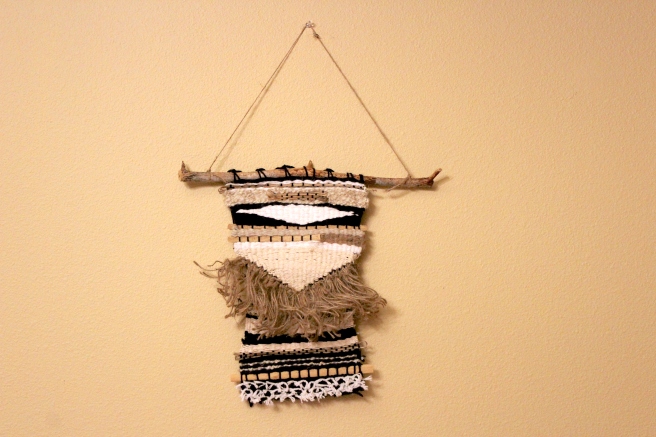
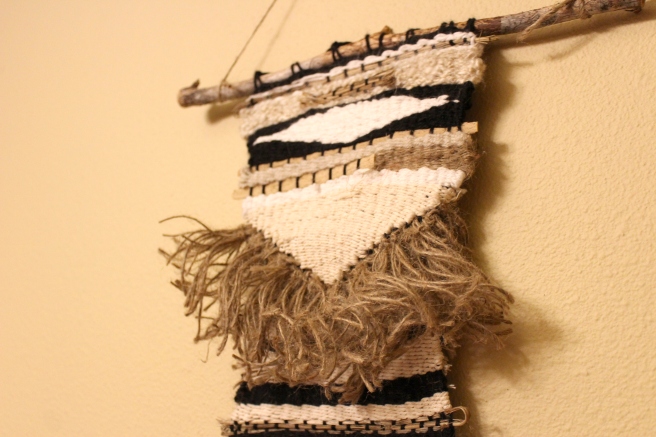
Overall, I really love how it turned out! However, for next time I would like to keep the weaving the same width throughout and I think I could have done that if I secured the tassels in by just weaving around them. Because I am in love with the top half of the weaving, but think I could improve on the bottom half. I did also try to incorporate some lavender, but it came out as I continued weaving. I recommend waiting until the end to incorporate any elements such as dried flowers or leaves to prevent that from happening. Overall, I really love the different textures incorporated and had fun experimenting to get different shapes and patterns. Next time, I can go more into depth about how I create these.
You can see that my finished wall hanging is much different from the original one I was taking inspiration from. However, I love the idea of incorporating these natural elements into a hanging. It was so cool to find elements outside that I could weave into a hanging. I am also very inspired to use some of these to weave a basket. I will try that out and discuss how it works out in a future post. Also, please comment below on any blogger DIY projects you have recently seen that you would like to see another blogger’s spin on. Thank you so much for reading! I hope you have an amazing day!
– Hannah


Comments
Post a Comment